Advanced photo editing tools like Adobe Photoshop, Lightroom, Corel Paintshop Pro, etc., made editing easily accessible to photographers. However, getting used to this professional suite can sometimes feel intimidating, especially for beginners.
With that in mind, Skylum developers from Ukraine created Luminar Neo. Unlike other intimidating photo editing programs, with AI-centered photo editing capabilities, anyone can make professional adjustments to their images without spending enormous time mastering the program.
Luminar Neo Review: Quick Summary

Pros
- Intuitive Interface
- Exceptional end results
- Works as Adobe Photoshop & Lightroom Plugin
- Portrait AI produces good quality results
- Mesmerizing Sky Replacement tool
- Data Backup
- Use the same tools multiple times without losing previous edits
Cons
- Insufficient organizational features
- Limited Preset collection
- Limited Layers Capabilities
- Some AI features are not so effective
overall
USD 99.00
Supported Platforms: Windows, OSX
Interface
4.5/5
Features
4/5
Performance
4/5
Support
4/5
In short, Luminar Neo is an easy, fun, and accessible AI Photo Editor that can turn regular photos into something exceptionally dramatic with just a single click.

In this Luminar Neo review, I will share my insights on the comprehensive functions of the latest update of Luminar Neo (1.19.0) and its practical worth to photographers.
Pricing Details
Luminar Neo has monthly, yearly, 2-year and lifetime license (one-time payment) plans. The pricing details are as follows:
With a Subscription and a lifetime license, you get access to the Luminar Neo photo editor app, including Extensions and Generative tools (GenSwap, GenExapand, GenErase).
Subscription plans allow software use on 2 devices, whereas the lifetime license is for 1 device only. You also get unlimited access to Generative tools during your subscription instead of 1-year access in a lifetime license.
Before committing, you can explore Luminar Neo's features with a generous 7-day fully functional trial, which allows you to experience the software before purchasing.
Supported Platform and Installation
Luminar Neo supports both MAC and Windows OS platforms. However, ensure that your system meets the minimum requirements specified by Luminar. Otherwsie, performance could be sluggish.
The installation of Luminar Neo is straightforward. Sign in to your Skylum account and download the file from the My Software tab. Once the installation file is downloaded, a single click is all it takes to install Luminar Neo, making the process quick and hassle-free.
After installation, log in to your Skylum account on the app to get started.
Luminar Neo: User Interface Review
The user interface of Luminar Neo is adeptly organized, clutter-free, and intuitive. Any photography enthusiast, regardless of their experience, can easily navigate through all the functionalities available without needing the help of manual guidance.
Dashboard

Upon opening Luminar Neo, you will be greeted with an interactive guide that will assist you in learning how to edit sample images within the software. Furthermore, the guide also helps you locate all the essential tools and provides instructions on editing photos in various genres.
Upon familiarizing yourself with the software, you will find a sleek, dark-themed interface divided into three panels, streamliming the workflow. To get started with the editing, you will find three modes to select from at the top of the window.
- The Catalog allows you to view the images of your chosen folder.
- After selecting the picture you want to edit, you get the option to apply Presets from pre-installed lists.
- Manually edit the picture by clicking the Edit option.
The left sidebar of the dashboard provides a comprehensive range of options for adding photos, folders, or albums. At the top of the panel, the "Add Photos" option provides two choices:
- Adding a folder of photos or
- Selecting individual images for import.
Below that, you can conveniently access other categories like:
- All Photos
- Sample Images
- Single Image Edits
- Recently Added
- Recently Edited
- Lost Edits and
- Trash files.
A notable improvement in the latest update is the ability to drag and drop images from the Catalog to any tab on the left panel, enhancing categorization efficiency.
The right panel of the dashboard provides meta descriptions of selected images, Generative tools, and Luminar Neo extensions like HDR Merge, Focus Stacking, Upscale AI, and Panorama Stitching.
Note: In contrast to other photo editing platforms, Luminar Neo does not offer the option to manually adjust the meta description of an image. Additionally, if you want to install Luminar Neo extensions, simply find the 'Extras' button at the top right of the window.
If you are looking for additional menu items like exporting options, help, file, support, and others, you can access them by clicking the Luminar Neo Icon on the top-left corner.
The unusual positioning of menu items can confuse the users. Therefore, I can only wish Skylum to provide a dedicated Menu section in their future update.
Editing Panel

Similar to the dashboard, Luminar Neo has kept its Editing panel visually neat and easily understandable.
To edit a photo, choose the desired photo from your library and click the "Edit" button at the dashboard's top. This action will lead you to the editing module, where you will find all the editing options listed on the right side of the screen, including Luminar Neo extensions.
Most editing tools in the editing panel have a slide bar that simplifies applying the adjustments. Additionally, advanced editing tools utilize artificial intelligence (AI), allowing you to achieve results with just one click. Despite being advanced, Luminar Neo remains highly accessible even for beginner editors.
Luminar Neo also has a convenient Before/After mode that allows you to easily compare edited images side by side. This and other visual measurement tools are located at the bottom of the editing window.
Luminar Neo: Key Features Review
Apart from the standard editing features, Luminar Neo is known for its advanced and efficient AI Tools. These tools are categorized into five parts (Essential, Landscape, Creative, Portrait, and Professional) for user convenience, which I will be discussing below:

Essential Tools
The Essential Tools section in Luminar Neo helps you to make useful basic adjustments. Below I have briefly assessed a few of the essential features I liked in Luminar Neo.
Develop Tool

This tool lets you adjust the color and tone of the images. It also allows adjusting the RAW file formats. When you open an unedited RAW file for editing in Luminar Neo, a RAW indicator beside the feature is visible, which I found to be a valuable addition. Moreover, you can select from various camera profiles to optimize the control over RAW footage. After setting up, you can color-correct your footage according to your desired mood and preferences. You can adjust the curves, lighting, black-and-white levels, color, sharpness, and more.
Enhance AI

The Enhance AI tool consists of two helpful adjustment options, Accent AI and Sky Enhancer AI. This feature automatically analyses the image and enhances the photo with the help of artificial intelligence.
Accent AI is basically a compact form of 12 traditional composition-controlling tools in the form of a single slider. After applying the slider, the artificial intelligence will balance the highlights, shadow, exposure, contrast, and other details to the need of your image.
The feature is more effective with an underexposed image.
Sky Enhancer AI detects the sky in the background and applies necessary adjustments automatically. The feature adds details to the overall quality of the sky by enhancing the elements present, like color, clouds, sunlight, and sunsets.
The Artificial Intelligence process cannot detect grey, unfocused, or blurred skies and is not designed to work with night sky environments.
Powerlines and Dust Spots Removal Tools

Sometimes unwanted wires and dust spots can ruin the overall beauty of a photo, and this is where Luminar Neo's Powerlines and Dust Spots Removal tools come in handy.
Both tools are available under the Erase section. With a single click, the AI of Luminar can erase the wires and dust spots from the image in view. You can manually erase the powerlines and dust spots by adjusting the brush size and clicking on the lines you want to erase.
Remark
The tool is most effective when not many elements are present in the image. Otherwise, it might produce some abrupt results. At times, the tool also fails to recognize the dust spots present on the image.
Interesting Fact: I found the feature similar to Photoshop's healing tool upon manual usage.
Structure AI
This tool can enhance the clarity of your image. You can increase the details by sliding the slider to the right, and the AI will adjust the areas variably based on the subject. As a plus, the feature will not overprocess the people in your image. It will keep the details intact while making the objects look more enhanced and smoother.
Landscape Tools
It is a new addition to Luminar Neo. This feature contains all the tools to help you optimize your landscape photography. Below, I have mentioned a few tools that I found effective, allowing me to achieve stunning landscape images.
Sky AI

Honestly, I got engrossed while testing Luminar Neo's Sky AI feature. The feature can instantly swap a bland sky with good selections of appealing skies from Luminar's collection, which in my opinion, is efficient. Additionally, in the latest update of Luminar Neo, you are provided with sky recommendations and multiple adjustment toolsets that complement your photo effectively.
During my Luminar Neo review test, the feature processed exceptionally fast and didn't put much pressure on the program's performance. Another impressive fact is that the tool replaces the sky and enhances the overall quality that suits the image.
I got mesmerized upon noticing a perfect reflection of the applied sky on a water surface. I appreciate the detailing that the Skylum team had thought of for Luminar Neo. They even went an extra step and allowed the users the ability to play around with the Reflection mode.
Remark
Sky AI is a quick and easy way to switch a mundane image into something creative without performing manual action. However, I would greatly appreciate it if Luminar Neo could include the ability to add sky images from our local drive as an option within the Sky AI tool.
Water Enhancer AI

This tool can boost the overall look of the water elements in your images. Using AI, Luminar Neo automatically identifies the water areas in your image, after which you can tweak parameters such as brightness, contrast, and color to elevate the natural beauty of your image. For precise adjustments, you can leverage its advanced compositions, such as drawing, erasing, and restoring specific water areas to make the images more vivid.
Twilight Enhancer AI

Are you looking for an easy way to replicate the hues of Golden and Blue Hour in your images? This one-click Twilight Enhancer AI tool can be useful. It can save you the time and effort typically spent on color correction to mimic the same signature style.
With just a single click, you can easily replicate the atmospheric conditions of the Golden and the Blue Hour, elevating landscape and outdoor photography with their natural lighting and color effects. You can choose from its five pre-defined presets, Golden, Blush, Blue, Emerald, and Mauve, to enhance your photo effortlessly and simplify editing. Furthermore, you can also tweak other adjustment parameters like any other tools in the application to have more control over your image and create an impressive outcome.
Creative Tools
The Creative Tools section in Luminar Neo allows users to experiment with innovative AI tools to add more depth and artistic expression to the photo. Tools include Relight AI, Matte, Neon & Glow, and Blur, to name a few. Neon & Glow is one of the few Creative Tools that grabbed my attention by producing stunning results.
Relight AI

Photographers, like everyone else, are prone to making mistakes. Sometimes, they may unconsciously click an underexposed photo, leaving the camera's manual settings unchanged. However, Luminar's Relight AI comes into play to rectify such errors.
With the help of Artificial Intelligence this tool can effectively enhance the overall lighting of an underexposed photograph without compromising the quality. With just a few clicks here and there, you can effortlessly transform a poorly lit image into one with better lighting.
Neon & Glow

For product photography enthusiasts seeking to elevate their products' appearance, this new addition from Luminar Neo can make your products look more eye-catching.
Neon
As the tool's name suggests, you can easily create a neon effect around the subject without hassle. This feature offers two options for application:
- Manual Drawing: Applying this will allow you to freely draw over your subject or object, providing precise control over the areas.
- Automated Object Recognition: This feature allows the program to automatically identify the subject within the image and apply the neon effect accordingly. After that, you adjust other effect parameters according to your needs.
Remark
In my test, the auto-recognition feature worked impressively well. However, the manual drawing could have been better. Using a mouse pointer for precise drawing can be tricky. Therefore, adding various shapes in the draw panel could significantly enhance the outcome of the neon effect.
Glow
This tool helps you make your subject glow in inner or outer regions. The Refine Object option in the adjustment panel allows for more versatile adjustments for refining selected areas. Within this tool, you can draw to add, erase, or restore areas of your selection. You can further adjust the brush's size, softness, and strength for precise selection control, ensuring your editing is accurate and detailed.
However, during my tests for Luminar Neo review, the feature utilized a considerable amount of Glow, often making the surrounding areas brighter.
Blur

During my Luminar Neo review, I found the Blur tool to be quite enjoyable to use. The program provides four types of blur effects: Gaussian, Motion, Twisted, and Tilt-shift, all producing impressive results. However, before applying the tool, I suggest masking the objects you want to blur. Otherwise, the application might blur out the entire image.
Portrait Tools
Portrait tools are another useful addition by the developers of Luminar Neo. It targets the pain point of photographers who lack expensive lenses or gadgets to work on captivating retouch edits within a minimum amount of time while keeping the quality of the photo intact.
Tools include Studio Light, Portrait Bokeh, Face AI, Skin AI, Body AI, and High Key. These useful features make retouching easy and the result stirring.
Studio Light
This tool is another creative solution to easily recreate the striking lighting effects commonly seen in studio setups. When you apply this feature, you can generate additional light sources to improve the overall lighting of your images. Furthermore, you can position the light source around the object for your desired lighting. Like other tools in the program, you can make further adjustments to the additional light sources, including control over brightness, contrast, smoothness, and more.
Portrait Bokeh AI

This is a useful tool for those obsessed with bokeh images or photographers lacking a lens with a large aperture (E.g., a kit lens on a crop body). The AI uses human-aware 3D depth mapping that can mimic the look of a photographic bokeh effect.
Applying the Portrait AI Bokeh is easy. After selecting the feature followed by a click, it will automatically recognize the subjects in the photo and exclude them from the background to apply the bokeh effect.
Remark
Luminar Neo's Portrait Bokeh AI feature may not always deliver accurate results, especially when editing images with intricate details. But it does offer a saving grace in the form of customization options.
You can manually apply the bokeh effect using a brush, allowing you to mark specific subjects they want to exclude from the background for a more convincing fake bokeh effect. This feature provides good control and flexibility, enabling you to fine-tune the effect to your liking.
Tip: For impressive results, it is recommended to use an image with a wide depth (a good amount of physical space between the subject and the background).
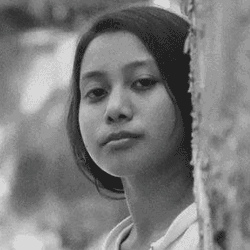
Face and Skin AI

Manual retouching can sometimes be overwhelming. Nevertheless, Luminar Neo's Face and Skin artificial intelligence makes it quick enough to produce remarkable results. It is a great tool for portrait, fashion, and editorial photographers.
With Face AI, you can adjust the face's lighting, add more depth to the eyes, enhance eyebrows, remove dark circles, whiten the subject's teeth, and make the lips more profound without any manual hassle.
With the Skin AI, you can achieve a blemish-free realistic, smooth skin texture for the subject by moving the sliders available in the panel.
Remark
I usually like to click portrait pictures, and manual editing through Photoshop was time-consuming and difficult. Luminar Neo's Face and Skin AI made the work easy for me. With the convenient adjustment sliders, I achieved a stunning result in a short amount of time.
The feature's effectiveness is outstanding. It will save time for those who want to do quick retouching without fearing the loss of the image quality.
Professional Tools
The Professional Tools in Luminar Neo focus on precise control over certain advanced features. Tools include Supercontrast, Color Harmony, Dodge & Burn, and Clone.
Clone

I have enjoyed using the tool to manipulate my unnoticed mistakes from some photos.
This tool allows you to replace unnoticed or unwanted parts of your image by copying pixels from a selective source of your existing image.
It is easy to apply the Clone tool. The process requires selecting the primary source of pixels you want to replicate. After that, you can blend those pixels into the damaged areas. Adjust the brush size and tweak the brush's softness and strength (Opacity) as per your requirement.
Tip: I recommend using short strokes and lower opacity for a smooth, blended look. Use the Alt key to change a new sample source.
Supercontrast
The Supercontast feature falls under the Professional Tools section. It allows you to adjust the contrast of a photo's highlights, mid-tones, and shadows.
To make the adjustments, you can tweak the sliders available and balance the shadows to create a brilliantly edited landscape image.
Mask AI

Quirky AI tools are the main attraction of Luminar Neo, and the Mask AI feature made the program more eccentric. The masking AI feature is simple and aims to speed up the conventional masking process.
Mask AI can automatically detect and highlight up to 9 objects and elements in the image. Then, you can take the necessary actions to post-process the selected area. Furthermore, the program allows various masking options, including Brush, Linear Gradient, Radial Gradient, Luminosity, Mask AI, and Object Select AI. I have discussed a few of them below that I found handy.
Remark
Frankly, I am impressed with the accuracy and effectiveness of Mask AI. Applying the feature over an image took nearly 15-20 seconds.
The Brush option inside the masking element is one of the handy features I have used in Luminar Neo. It allows you to erase unnecessary objects quite seamlessly, and the Paint option allows you to manually mask the subject you want to edit.
The Linear Gradient tool inside the Mask AI is good for focus shifting. This feature lets you shift a viewer's focus toward a subject you want them to see. You can also use it to cover areas you feel are overly exposed.
Object Select AI was particularly useful. It efficiently masks the main object in the image, completing the process in approximately 4-5 seconds.
Note: The Masking feature is available inside almost every tool. However, the detection of elements could sometimes show abrupt results.
Layers and Presets

Layers and Presets are two great additions to Luminar Neo's features. The layer option is on the left side of the editing window. Here, you can choose a few overlays or apply your unique overlay from your device.

Luminar Neo has 8 preset collection categories, offering many options. Additionally, to enhance the editing experience, the software now allows you to scroll through the list of presets and view the effect of each preset on your photo simply by hovering over it.
I found this new functionality convenient, as it makes the editing process faster and easier by providing a real-time preset preview without needing to manually click and apply each preset individually.
Note: You can edit the applied Presets in your editing panel. However, you cannot simultaneously add more than one preset without losing the past edits.
Tip: You can add unique edits as a preset by navigating to the 'Actions' option at the bottom of the editing window and selecting the 'Save as Preset' option for further use.
Extensions
Luminar Neo's Extensions Pack offers various tools to address specific editing challenges. Each extension serves a unique purpose and helps enhance different aspects of your images. Let's take a quick look at the advanced extensions Luminar Neo offers.
Magic Light AI
This tool improves the appearance of lighting in your photos by adjusting brightness, softness, and hardness and adding flares or light trails.
Note: Best for low-light images with street and fairy lights to create a mystical look.
Sharpen AI
It uses artificial intelligence to enhance image sharpness, eliminating soft focus caused by camera shake or shallow depth of field. The tool is best used to refine a minor blurred object in the photo caused by movement.
Focus Stacking
This extension allows you to change the focus point in your images during post-production, eliminating the need for reshooting or taking multiple shots. What is more interesting is that you can stack upto 100 photos with different depths of field, and the focus stacking feature will align, crop, and balance them automatically.
Note: To make this feature work efficiently, you will need multiple pictures with varying focus points covering the entire depth of field of the scene.
Upscale AI
It enhances image quality, sharpens details, and revitalizes colors, making it ideal for photo restoration or enlarging specific sections of larger images.
Background Removal AI
By efficiently detecting the main subject, Luminar Neo takes background removal to a new level using advanced AI processing, making it easier to transform portraits or product images.
Noiseless AI

The extension automatically detects the density of the noise present in the image and suggests adjustments accordingly. If you are not impressed with the result, you can also tweak the adjustments by moving details and sharpness sliders. During my Luminar Neo review test, the extension provided an average result.
HDR Merge
With Luminar Neo's HDR Merge, you can take two or more photos to enhance the dynamic range of your image. The artificial intelligence will automatically detect the brightest elements and darkest shadows and combine them to create an amazing picture with a high dynamic range.
Panorama Stitching

Luminar Neo's new extension allows you to blend multiple images to create a beautiful panoramic view. One of the best advantages of this feature is that you can merge images to create panoramic images and leverage video footage to do the same. The tool worked effectively during my test and produced results faster than anticipated. The blend was smooth and effective. This feature helps you to create a wider perspective of a landscape image. Furthermore, the Custom Object Composition helped me create stunning multiple object framing into the image.
Overall, these extensions in Luminar Neo provide specialized solutions to refine and enhance your images with greater ease and efficiency.
What's New in Luminar Neo: Generative Tools
The inclusion of new Generative tools in Luminar Neo enhances your editing capabilities.
GenErase
With the GenErase tool, you can effortlessly remove unwanted objects from your image and replace them with textures and elements seamlessly integrating into the surrounding environment. During my tests, the feature took approximately 15 minutes to process, erase, and replace a broad image background area.
Note: While the feature performs exceptionally well with broad image areas, it encountered difficulties handling minute details in my experience.
GenSwap

It is another generative AI editing tool from Luminar Neo. The GenSwap tool enables effortless swapping of elements in your photos with AI-generated visuals to enhance their overall appearance.
The feature successfully swapped small elements in photos with AI visuals during testing. However, the generated visuals appeared unrealistic in some instances compared to the original photo. Additionally, there were occasional failures in generating visuals or instances where watermarks were embedded into selected areas.
GenExpand

This incredible tool allows you to effortlessly extend the boundaries of your image, whether for creating panoramic landscapes or providing more space within the image. The GenExpand tool utilizes AI to analyze the image and anticipate how the additional space will be filled.
Tip: To maximize the use of this feature, I suggest you use relevant prompts to effectively broaden the space in the image.
Luminar Neo Review: Performance
The system specifications during the test of Luminar Neo Review:
Processor: AMD Ryzen 5 3500U, 2100 Mhz, 4 Core(s), 8 Logical Processor(s)
OS Version: Windows 11 Home Single Language
RAM: 12GB
Disk: 512GB SSD
Graphics: AMD Radeon Vega 8 (Integrated)
Idle State Resource Usage

During my testing for the Luminar Neo review, using processor-intensive AI tools did not affect the application's stability. The CPU showed no signs of spike, and the RAM consumption was constant at 2.0GB in its idle state.
Editing Process

While editing, the graph spiked up, consuming 59.28% of CPU resources and 6.3GB of constant RAM consumption.
Apart from the AI features, all other aspects of Luminar Neo performed admirably well, showcasing excellent responsiveness and seamless transitions. Switching between the 'Catalog,' 'Presets,' and 'Edit' modules exhibited minimal to no delay, a notable improvement compared to previous updates, which often faced challenges.
Remark
I am quite fascinated by Luminar Neo's performance improvements over time. Having tested the former versions of the application, I can attest that the latest version is significantly less buggy, with smoother performance and notably no overheating or crashing issues. While utilizing the AI features, the program worked efficiently without causing major slowdowns.
However, I faced a minor issue while browsing the web when Luminar Neo operated in the background. With multiple tabs open, switching between those became troublesome. Nonetheless, Luminar Neo operated well with its other functions and features.
Note: I prefer Luminar Neo on a device with 16GB of RAM space. Otherwise, the program will pass its load to the Disk and CPU, which is unadvised.
Exporting and Sharing
Luminar Neo's exporting and sharing options are limited. However, it is useful for those who want quick exportation of files without caring about the formats. Unlike Adobe Photoshop and Lightroom, Luminar Neo provides basic image exporting formats like JPEG, PNG, TIFF, JPEG-2000, Photoshop, and PDF, which is enough for day-to-day usage.
However, there's no direct image-sharing option available for sharing your pictures online. You can either send them through mail or share them via Luminar Share. Luminar Share allows you to wirelessly transfer images to your Android or iOS device and vice versa. You can share them via your favorite social media or online platforms.
This feature can be handy for quickly accessing your photos through mobile devices.
What's Missing
Even though Luminar Neo offers a great range of interesting and innovative AI-powered tools, it still misses out on the functions of conventional professional photo editing tools. Some of them are listed below:
- Luminar Neo has the most basic organizational tool. Users cannot add keywords, captions, or meta details for easy recognition. Moreover, you can not find images based on locations, which could have been useful.
- Limited Layers and Presets collections.
- It has limited exporting and sharing options.
Luminar Neo Review: Overall Experience
Luminar Neo is an exceptional AI-based photo editing platform offering high-quality outputs with minimal time and effort.
What I Like
Here are a few reasons why I found Luminar Neo impressive.
- Achieving outstanding photo outputs with high-quality results requires minimal time and effort in Luminar Neo.
- The software excels in processing RAW footage, ensuring image quality remains sharp and unaltered.
- A mesmerizing feature is the ability to enhance and adjust the sky, seamlessly integrating specific tones and colors to create visually appealing images.
- Luminar Neo simplifies photo retouching, allowing for swift and efficient edits compared to traditional professional photo editing software.
What I Dislike
I encountered a drawback while testing Luminar Neo.
- Despite being a strong AI photo editor, the Preset collection feels basic, lacking diverse options to enhance editing flexibility and creativity.
Luminar Neo: Support
No software is perfect, and there are inevitable chances that a user might face issues while processing through a program. Thus, good customer support is a mandatory requirement for any reputable software. And so far, I am highly impressed by the rapidness and efficiency of Luminar Neo's customer support. They provide three support modules which are:
- The FAQ section: The FAQ section has almost all the answers to the general queries of the user.
- User Guide: The user guide can be helpful if you are stuck using a feature. It will guide you through the process of every feature available in the software itself.
- Contact Support: Luminar Neo offers 2 ways to contact their customer service - live chat and email support.
Compared with other AI Photo Editors
Here is a comparison with other popular photo editors.
Is Luminar Neo better than Photoshop?
Adobe Photoshop is the most renowned editing platform available in the market with its expensive subscription model. It can perform similar tasks to Luminar Neo and much more. However, you must have good knowledge of conventional photo editing.
Is Luminar Neo better than Lightroom?
Adobe Lightroom is another champion of Adobe's editing programs. It also provides a subscription-based service and is a good image editing and manipulation tool. However, you have to learn it before you can start editing photos. In contrast, you can easily start your editing process with Luminar Neo.
Is Luminar Neo better than Movavi Photo Editor?
It is a beginner-friendly photo editing platform with similar AI features to Luminar Neo's auto enhancement, retouching, and quick photo background removal.
Old Photo Restoration is the key highlighting feature of Movavi Photo Editor, which can turn your old black-and-white photo into a colorful one. However, it certainly lacks the proficiency of a stand-alone professional photo editing application compared to Luminar Neo.
If you want something easy and lightweight, you can surely opt for Movavi Photo Editor. Learn more in this Movavi Photo Editor Review.
Note: Luminar Neo provides better features, effects, presets, and AI editing solutions than Movavi Photo Editor. The only drawback is the performance in low specs devices.
Frequently Asked Questions
Is Luminar Neo easier than Photoshop?
Packed with multiple AI-powered components, Luminar Neo has a slight advantage over Photoshop. However, Luminar Neo lacks the proficiency of professional editing software like Photoshop but can easily tackle complex image editing processes.
Can Luminar Neo process RAW files?
Luminar Neo can process RAW files like any other professional editing software. However, I experienced performance lag during the editing process.
Can Luminar be used as a Lightroom and Photoshop Plugin?
Yes, You can use Luminar Neo as a Lightroom and Photoshop Plugin.
Is Luminar Neo Worth Buying
I recommend Luminar Neo for its incredible AI features and beginner-friendly user experience. Using the tools is simple and saves a lot of time doing a job compared to other software, which would have taken great time and effort.
I have created a list of essentials to test the best fit for Luminar Neo:
Buy Luminar Neo if You are
- Beginning with photography, and want to save time by editing a complex image through single-click AI.
- A home user who wants to edit/enhance photos.
- Hesitant to pay for expensive Adobe subscriptions.
- Finding it difficult to edit photos with Lightroom, Photoshop, and other professional photo editing tools.
- A portrait photographer and love retouching your images.
Don't Buy Luminar Neo if You are
- A professional photographer who wants complete control over photo editing, similar to Lightroom, Photoshop, etc.
- In need of quick sharing and printing options.
She reviews software at Dealarious, mostly recovery and productivity tools, which she tries out herself. Her goal is to keep things simple so readers don’t waste hours figuring out what works. Over the years, she has tested dozens of apps and learned that small details often make the biggest difference.
When she isn’t testing programs, you’ll usually find her hiking in the mountains or enjoying the rain. She believes good tech should quietly make life easier, not more complicated.