Undoubtedly, videos have become the most substantial form of content consumed by people. Well! thanks to smartphones, everyone can now shoot videos. However, with so many videos coming up daily, most fail to spike interest among their audience. Good video editing can add spice to any video and lure in more views.
This article will help you discover the best video editing tips and tricks so that you can create engaging videos.
Basic Video Editing Tips
Before jumping straight into advanced video editing tips, let's go through some basics of video editing. These tips will help you understand some basic terminologies to make a perfect post-production video.
Creating A Structure
By planning your editing structure early on, you can interpret how your video will turn out in the end.
- Understanding different cuts and transitions, multiple visual effects to go with the scene, different scenes, and shots positioning
- Collections of music, and Sound effects.
Advantageous Tip: During Shoots, take a few extra footages apart from your script to have some flexibility during edits. Besides that, acquire knowledge on different shots and angles used during filmmaking to give your video a more professional look.
Pro-Tip: Background music plays a vital part while engaging with the audience. Hence, before starting your edits, collect good pieces of music and make cuts and trims accordingly. The music should suit the mood of the scene and the story that you want to present.
File Organization
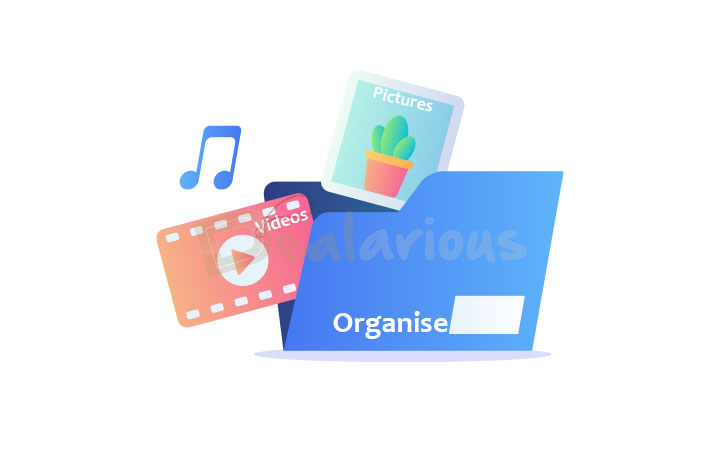
Misplacing important source files during edits can escalate major headaches. So, always organize video and audio files before importing them into the video editor.
You can organize files into multiple folders and sub-folders. Label those folders according to the file type, such as B-Roll, Scenes, Music, Sound effects, Graphics, Photos, and more. You can then place all the materials in the dedicated folders, making things easily accessible.
Pro-Tip: You can label each file with a brief description of its content to better understand that file during the edit.
Selecting The Right Video Editing Software
Video editing need not be a daunting task. Like any other skill in demand, numerous tools and software help with video creation and editing. However, you should choose the right video editor that fulfills your needs, compliments your expertise, and is within your budget.
If you are a newbie, go for a beginner-friendly app, and you can upgrade to a more advanced app when you have mastered the basics. For instance, Movavi Video Editor is a popular choice for beginners. It is feature-packed with all the basic editing tools required for creating engaging videos & yet extremely simple to use. You can learn more in this Movavi Video Editor review.
Similarly, Wondershare Filmora is great for beginners as well as semi-experts. For professional editing, you can use some advanced apps, like Adobe Premiere Pro, FinalCut Pro, and DaVinci Resolve. You can always opt for a free trial before making a purchase. Many video editing software programs are available for Mac and Windows OS.
Are you looking for beginner-friendly video editing apps? Here are 6 of the best video editing software for beginners that you can experiment with.
Practice, Practice, Practice
Practice makes an Editor perfect. Before diving into hardcore video edits, I recommend you practice your skills and take feedback from Friends & Family.
Looking through video examples will give you a fair idea of what you want in your videos. Pay close attention to professional work. Apply the same effects and experiment with different editing tricks.
Create a Backup
Creating a backup is one of the most important video editing tips. There's nothing more frustrating than losing the latest edits due to some unexpected error. Adobe Premiere Pro users must be familiar with such kinds of situations. Thus, creating a backup of all the files and saving work progress with every new edit can save you from losing all the latest edits.
Advantageous Tip: Nowadays, advanced video editing software comes with an auto-save feature. Hence, while purchasing a good video editing program, make a fair comparison and see if the application features auto-saving functionality.
Pro-Tip: Create backups in two additional locations (an external hard drive and a cloud server) for your peace of mind. The backup will ensure the safety of your files from uncircumstantial accidents.
Video Editing Tips and Tricks: Video Enhancement
Synchronization
Synchronization is the most vital part of video editing. Without proper audio and video synchronization, the videos will feel bland and out of context.
Make cuts to footage on par with the beats of the music for a quality outcome. You can add markers in the respective beats of your chosen music on the timeline and make cuts on the video accordingly. This process will ensure smooth sequencing, which enhances the viewing experience and a good emotional response from the viewers.
If you want an unchallenged way to apply beat detection to your video, in that case, you can try Movavi Video Editor's Beat Detection feature.
Color-Grading Your Videos
Remember, colors convey emotions. Using a standard color pallet across all your video clips makes them appear more uniform & professional. It also sets the correct tone of the content and establishes the right atmosphere for your audience.
Most popular video editors come with color grading and color correction options; ensure that you utilize them to their full potential.
Pro-Tip: If you are a beginner having difficulty color-grading your videos, you can also download LUT packs from various web resources to add a nice touch to your video. However, make sure to keep an eye on all the adjustments made to the applied LUTs for learning purposes.
Add Effects and Transitions
You will often stitch several separately shot video clips into one video film. Hence, use transitions to enable a smooth, easy experience for the eye.
Transitions help the story progress, set a particular mood, and establish the stage for the next shot. However, there are numerous Transition types that have different significance. Please make sure you choose them thoughtfully so they always complement your video story perfectly.
On the other hand, effects add a tinge of creativity to your video. Apart from well-known professional Video editors, multiple beginner-friendly video editors nowadays have ample effects and sound effects to choose from to make your videos more creative.
Using Different Cuts
A video cut is a form of transition that helps editors merge different shots to tell a good story. You can use multiple cuts while editing videos. Here are a few basic cuts that will help you tell better stories.
Hard Cut
It is a standard cutting process in editing. Hard cuts are made to direct the viewer from one scene to another. You can achieve this by making cuts between scenes and merging them.
J and L Cut
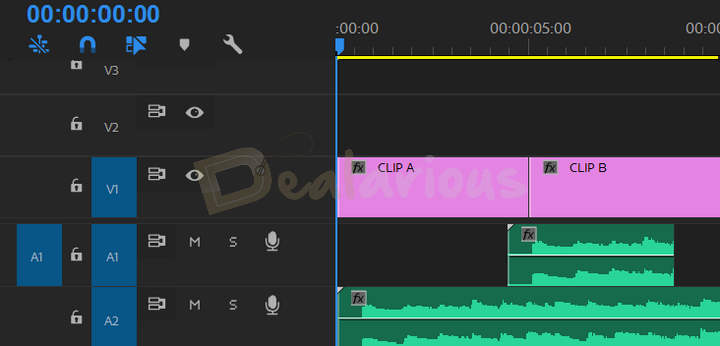
J Cuts and L Cuts are a little advanced cutting style that enhances the overall quality of how a video performs. These cuts are audio-based and overlap the audio from one clip to another.
Suppose two clips (CLIP A and CLIP B) are merged, and you want to perform the J and L cuts over those clips. So, to perform a J cut, you need to overlap a tiny part of the audio from the B CLIP with the A CLIP video.
The L Cut is the opposite of the J Cut. To perform the L Cut, you must overlap A CLIP's audio in continuation with the B CLIP.
Note: J and L cuts are most useful during overlapping sound effects from one scene to another.
Jump Cut
Jump Cuts are the most basic cuts made by beginner editors. These cuts indicate the passage of time and are used while moving backward or forward in a film's chronology.
You can also use these cuts while making angle shifts during a conversational scene. These cuts are most handy during interview shots.
Cutting on Action
Your video will perform better if you make cuts on action or movements instead of waiting for a pause in the video. This way, the transition in the video will look smooth and visually appealing. With Cutting on Action, you make cuts during a scene in continuation and join in with the other scene in continuation.
Note: Cut-on Action is mostly used during an action sequence in a movie.
Above mentioned cuts are the few basic cuts you can make during editing. Besides that, to learn further about in-video cuts, watch "Cuts and Transitions 101".
Video Stabilization
Videos captured in motion through budget smartphones and cameras often appear shaky. In situations like this, you can stabilize such wobbly footage during post-processing. Most video editors feature a video stabilization option that reduces movement and renders a smooth, stable video.
Note: I prefer using professional video editing tools to manually minimize videos' shakiness. However, if you are on a tight budget, beginner-friendly video editing tools such as Movavi Video Editor and Wondershare Filmora can give you some satisfactory results.
Pro-Tip: Use a tripod while capturing an object in motion to minimize the shakiness in your videos.
Chroma Key Effect
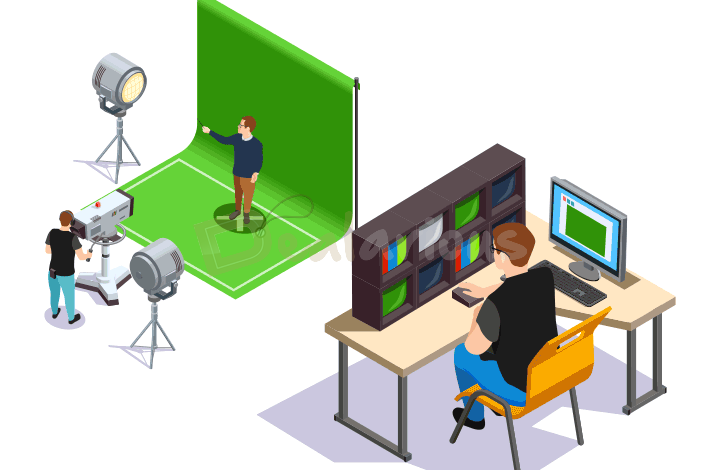
The Chroma Key is a revolutionary invention of the digital age. Using a green screen, you can use it to virtually depict any part of the world behind you. You can put it to creative use to create insane effects and environments without leaving your living room. Many video editors now come with a Chroma Key tool.
Using Inbuilt Enhancement Tools
Removing Background Noise and Background Elements from the video output is important. No one likes poorly produced videos with noisy backgrounds. Hence, it is recommended to record your videos in quiet places. But in uncertain situations where this becomes an impossible act to perform, you can trust advanced video editing applications.
Nowadays, beginner and semi-beginner-friendly Video Editing programs have multiple AI features that reduce background noise and remove disturbing backgrounds from a video. However, with professional video editors, you get the manual freedom of experimenting with those distracting elements.
Note: Eliminating all the distracting background noise and elements from videos ensures your viewers focus only on your content.
Exporting & Sharing
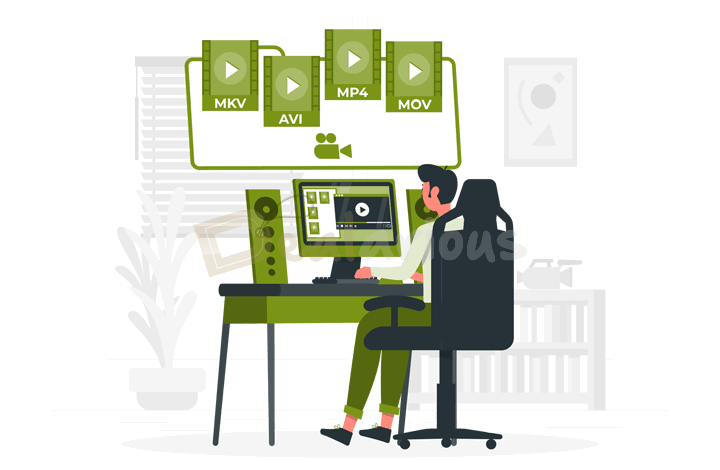
Once you've created good video files, you must also effortlessly export the finished video in various formats suitable for sharing them across various platforms—high-resolution, landscape or portrait mode, and more. Also, note all supported formats on every platform and the export time.
Make it a point to look for specifications like frame rate, bit rate, supported video codecs, and the largest video resolution allowed.
Other Useful Video Editing Tips and Tricks
Apart from the mentioned video editing tips, there are other tips that people do not often discuss. You can find those below:
Having A Good Computer Configuration
Working on a slow device often causes major headaches. Thus, to achieve an un-bothered editing experience, you should understand the requirement of your editing software or get a system with a good configuration for basic edits.
However, to save you some trouble, I have listed a few tips for optimizing and picking the right device for your video editing.
A Good Disk Drive
If you want faster-rendering speed, my prior recommendation would be to use an SSD instead of an HDD as your preferred storage device. SSD is a new-generation storage device that provides faster rendering, loading, and export time than HDD. However, if you are on a tight budget, you can also opt for HDD. SSDs are a little expensive compared to HDDs, but they are definitely worth the money.
Note: I recommend getting an SSD of at least 512GB storage capacity so that you can stay supplied when required.
RAM
With increased RAM capacity, you get a better editing experience. After opting for a good disk drive, you should look for a good RAM configuration. Extended RAM capacity ensures good rendering speed. Video editing is a very RAM-demanding task because your video editor stores all editing information in the RAM. Hence, ensure at least 8GB of RAM space while opting for a good system.
However, if you are interested in serious video editing, I recommend a system with at least 16GB of RAM.
GPU
If your video editing is focused on graphic-intensive works (e.g., numerous effects, high color grading, etc.), then I strongly recommend getting a solid GPU processor. It significantly reduces the load from the CPU.
Note: While getting yourself a GPU, keep an eye on the memory (in GB) and CUDA core numbers. The more the number, the better the performance.
CPU
A faster processor ensures faster rendering time. Thus, while purchasing a good device, ensure you get a top-rated CPU processor such as Intel's i5 or higher or an equivalent AMD processor for smooth functioning while editing your video.
Note: While opting for a good CPU, don't compromise on other mentioned configurations. If you have an amazing processor but end up cutting on the storage drive, RAM, or GPU, you will face a hard time during video editing.
Good Collection of Sound Effects
A timeless video editing tip would be collecting multiple sound effects genres. Whenever you hear a good sound effect, save it in the preferred sound-effect folder.
Learning Keyboarding Shortcuts
Memorization of shortcuts saves a lot of time and unnecessary hassle during editing.
If you are serious about video editing, I recommend learning keyboard shortcuts for your preferred video editing suites. You can get these shortcuts from the official website of the suite or through various web resources.
Keeping Video Footage Handy
Don't delete footage as soon as you take a preview. Keep those videos safe. Those videos can come in handy in uncertain times.
Be Open to Feedback
Always, Always ask for feedback from the audience or someone experienced. Getting feedback is the most important video editing tip of all.
People, especially beginners, often fail to learn from their mistakes or analyze their work. That is where feedback can save you. Well-structured feedback can guide you toward your goal and make you a perfect video editor.
Conclusion
If you are a beginner looking forward to kick-starting your career in the Video editing field, I recommend starting your journey now. Remember creating a video is an art, and it requires patience and practice.
With each passing day, there will be more skills to learn, which will further improve you as an editor. Choose your editing weapon wisely and implement these video editing tips in your content.

A Tech Enthusiast who adores the creative flow of nature, practices the philosophy of life, and wanders to explore multiple places. I solely believe the union of technology and nature can create a positive impact on the evolution of living beings on this planet. Above all I am an ardent learner who loves to share her translucent experiences.
Fantastic article…Thanks for sharing such an amazing content with .Good job.Keep it up.